Showing posts with label prints. Show all posts

4/25/2013

DIY: Aztec Shorts


Since I love prints and colors, aztec prints are perfect for me! Here is an idea to update an old pair of denim short! 

1. Choose a fabric of your choice, preferably with a thick texture for better support


2. Measure out the fabric onto the parts where you want to place the print. I placed mine on the right leg, top left pocket and right back pocket. Make sure to leave an extra inch to sew the hem.


3. Pin the printed fabric to the shorts using dress pins.
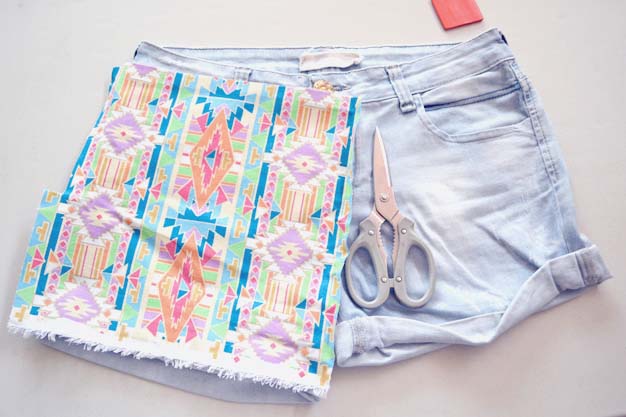

4. Sew using a machine or hand stitch. I had to hand stitch some of the areas, particularly the pocket area and the zipper line. Then, you should get something like this!


5. Pair with a simple tee :)


I apologize for the extremely late post! I have been wanting to share DIY videos but something is wrong with my Windows Moviemaker and I can't seem to find a good video maker similar to it :/

Plus, I am thinking of giving my blog a makeover! Since this template has some errors to it.

It is summer now where I live, at 35 degrees Celsius! Crazy summer heat is making me very lazy!  


7/09/2012

DIY: iPhone Case


I recently bought ethnic-printed fabrics and I wanted to use it for my next DIY, iPhone case. I have been wanting to change my case for a while now so I decided that this was the perfect opportunity to combine the two. I was not even sure if this would work but it did! and I am happy as to how it turned out. If you want to know how I made this, scroll down below for the steps.  


1. The first step is to cut out the area of the fabric that you want to use. Make sure that there is at least 1 inch extra fabric around the case. Next, lay out the casing over the fabric and trace the camera hole and side buttons with pencil. Cut out the holes using scissors.


2. Prepare your glue mixture. Mix 3:1 glue to water ratio.

3. Brush the glue mixture over the casing 


4. Place the fabric over the casing and brush over with glue.
5. Tape down the edges of the fabric onto the inside of the casing. Brush glue over the sides twice.
6. Let the case dry overnight.


7. Use scissors to trim off the excess fabric.


8. Brush a layer of clear nail polish for "varnish". I did not have any varnish or clear spray on hand so I used clear nail polish instead which works just as well ! *Make it work*


9. Let it completely dry for a few hours.  


The case smelled like glue + polish for the first 2 days but disappeared right after. I would advise those who will be making this to use fabrics with a more sturdy texture. I don't think fabrics such as silk or satin will hold on to the case.  Thats it! :)

You could also just glue pearls or fancy stickers onto the casing :)

"Will you be making your own iPhone case? :) "


1/18/2012

My Birthday Treat

I celebrated my birthday last week and decided to take a leave from work. How did I celebrate? By shopping of course! Im officially in my mid-20's! YIKES! and yet I still feel so unaccomplished and confused with my life. I got myself two chiffon blouses which I am loving right now :) The star printed top was a gift from my sister.

I love all the prints here! Leopard, polka dots and stars! I love how the mustard chiffon top is complemented with the polka dots, so retro! 
 
I also got some buttons for my DIY projects! Can't wait to get started on it!
 

Just an update, I finally bought a corkboard for my vision board. Took quite some time because I was looking for a larger one but I went to 4 branches already and they were all out. So I had to settle for this smaller one which measures about 15 X 23 inches. Oh so much to do!